Physical address:
128 City Road, EC1V 2NX, London,UK
If you have ever pulled a fitted wardrobe away from an outside wall and found a black, fuzzy patch of mould staring back at you, you are not alone. Mould behind fitted wardrobe external wall problems are one of the most common complaints we hear from London homeowners, and they follow a consistent pattern: storage is installed against a cold wall, air stops moving, condensation builds up, and within a season or two the back panel and the plasterwork behind it are covered in spores. The wrong solution — a dehumidifier and a can of anti-mould paint — will not hold for long. This article explains why external walls create a mould trap, what genuinely works to prevent it, and how we at Fixiz approach the diagnosis before we ever lift a tool.
Why external walls breed mould behind furniture — cold surfaces, trapped air, and condensation
The cause is rooted in basic building physics: warm, moist indoor air always moves towards cold surfaces and deposits its moisture there. Water vapour from breathing, cooking, showering, or drying clothes travels through a home until it hits something cold enough to cause condensation — and an uninsulated external wall is exactly that cold surface.
When a fitted wardrobe is fixed against an external wall, it does two damaging things simultaneously. First, it blocks the gentle air movement that normally keeps a wall surface dry enough to prevent condensation from settling permanently. Second, it creates an enclosed dead air space where temperature drops even further, because there is no heat input from the room. The wall behind a wardrobe can be several degrees colder than an exposed section of the same wall — the difference between an occasional overnight dew and a persistent, year-round moisture problem.
The dew point is the temperature at which air can no longer hold its moisture in vapour form. In a typical London bedroom at around 20°C, the dew point sits between 10°C and 12°C. An uninsulated solid brick wall — very common in pre-1930s London terraced housing — can easily reach 8°C or below on a cold January night. Night after night, moisture accumulates on the plaster and the back panel of the wardrobe until conditions are perfect for mould spores to colonise.
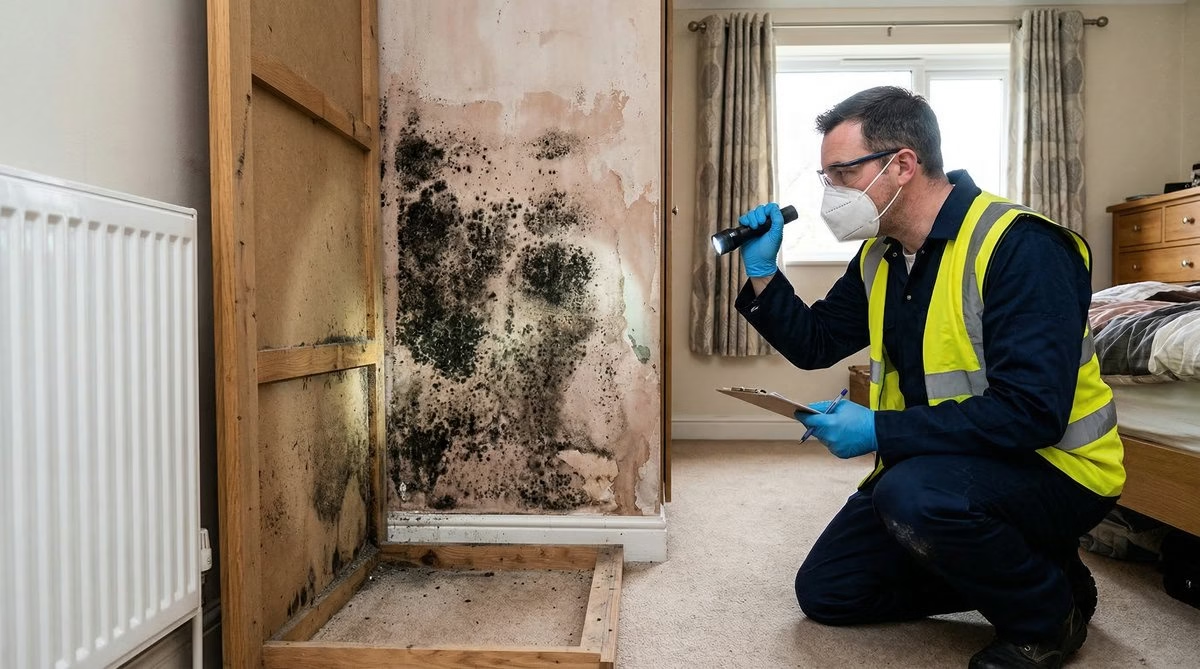
We investigated a flat in Camberwell where the tenant had complained about a musty smell from her bedroom wardrobe for two winters running. When we removed the unit — installed flush against a solid brick external wall with no gap and no ventilation — the entire wall behind it was covered in Cladosporium and Aspergillus, and the plaster was soft in places. There was no penetrating damp, no rising damp, no leak. The wardrobe had simply turned a manageable risk into an unventilated moisture trap.
Cavity wall properties, which became standard from roughly the 1930s onward, are not immune: if the cavity insulation has failed or was never filled, the inner leaf can still become cold enough to cause condensation behind furniture. Mould behind wardrobes almost always becomes visible in late autumn and winter, when external temperatures drop and heating cycles create larger differentials across the wall. The spore colonies simply reach visible density once conditions become favourable, but the condensation process has been running for months before that point.
Insulation, ventilation, or dehumidifiers — what actually works and what is a waste of money
When homeowners discover mould behind a wardrobe, the instinct is to reach for the most convenient fix — a dehumidifier, a spray of anti-mould paint, and a trickle vent in the nearest window. These measures are cheap and feel decisive. Unfortunately, they address symptoms rather than the underlying physics and rarely hold for more than one winter cycle.
A homeowner in Brixton ran a large-capacity dehumidifier continuously for three months after discovering mould behind her master bedroom wardrobe. The following autumn the mould returned, worse than before, because the root cause — a cold, uninsulated external wall with no air movement — had not changed. The dehumidifier could do nothing about condensation forming in the cold, enclosed cavity behind the fitted unit.
Here is an honest assessment of each approach:
- Dehumidifiers — useful for managing overall indoor humidity but ineffective at preventing condensation on a surface that is below the dew point. If the wall is cold enough, moisture will condense regardless of what the room’s relative humidity reads. Use them as a supplementary measure, never a primary solution.
- Anti-mould paint — contains biocides that inhibit mould growth on the painted surface only. Once the biocide is exhausted — typically within one to two years — the mould returns. Use it as a finishing coat after a proper fix, never as the fix itself.
- Ventilation gaps behind the wardrobe — highly effective and essentially free at the design stage. A gap of 50 to 75mm between the back panel and the wall allows air to circulate continuously, keeping the wall surface closer to room temperature. Ventilation slots in the top and bottom panels improve air exchange further.
- Internal wall insulation — the most reliable long-term solution for solid-wall properties. A layer of PIR-backed thermal board raises the internal surface temperature above the dew point even in the coldest UK winter conditions. The wall stays warm, condensation cannot form, and the mould problem ends at source. The trade-off is a small reduction in room depth — typically 70 to 100mm — and the need to re-fix skirtings, architraves, and electrical outlets.
- Cavity wall insulation injection — appropriate where an unfilled or failed cavity is contributing to cold inner-leaf temperatures, but only after a professional survey confirms the cavity is in a suitable condition.
- Positive input ventilation (PIV) systems — whole-house units that pressurise the property with filtered, tempered air from the loft. Effective at reducing humidity throughout the home, but best suited to properties with accessible loft space.
The honest hierarchy is: insulation first, ventilation second, dehumidification last. Warm the wall surface so condensation cannot form, then ensure air moves freely so residual moisture disperses. Dehumidification is a backstop — not a standalone remedy.
Can you keep a fitted wardrobe on an external wall — practical modifications that reduce risk
The question we hear most often is a practical one: “Do I have to get rid of the wardrobe?” In most cases, the answer is no — but the unit almost certainly needs to be modified or reinstalled differently. Removing a well-made fitted wardrobe is expensive and disruptive; modifying it intelligently is almost always preferable.
The most important single change is creating a standoff gap between the back panel and the wall. If the unit has a solid back panel fixed directly to the wall, that panel can be removed and replaced with a louvred or slatted version, or the solid panel can be retained but mounted on timber battens holding it 50 to 75mm clear of the wall surface. The gap allows air to circulate, the wall stays warmer, and condensation either does not form or evaporates before it can accumulate.
Ventilation slots are a complementary measure. Cutting 75mm-wide slots along the top and bottom of the wardrobe interior — or fitting proprietary ventilation grilles — allows warm room air to enter from the bottom, pick up moisture near the wall surface, and exit from the top. This creates a slow but continuous convective loop that mimics the natural air movement the wardrobe was previously blocking.
For sliding-door wardrobes, which are particularly prone to creating sealed cavities, ensure the doors do not form a completely airtight seal. Most modern sliding-door systems have slight gaps at top and bottom; do not fit draught excluders there — those gaps serve a ventilation function.
One further practical point: the floor of the wardrobe is often overlooked as a moisture pathway. In ground-floor flats, cold bridging through an uninsulated concrete slab can create condensation at the base of the external wall that wicks upward. Fitting a 25mm insulated board beneath the wardrobe base — or ensuring the wardrobe stands on legs rather than a solid plinth — reduces this risk considerably. Where the wall cannot be insulated at all, a freestanding wardrobe with a 100mm open gap behind it will perform far better than a fitted unit sealed against a cold surface.
When the wall itself is the problem — penetrating damp, failed cavity fill, and missing DPC
Not all mould behind wardrobes is condensation. A meaningful proportion of cases we attend — perhaps 20 to 30 percent — involve water entering the wall from outside rather than moisture condensing from inside. The distinction matters enormously because no amount of ventilation or internal insulation will stop mould that is being fed by a constant supply of external water.
Penetrating damp is the entry of rainwater through the external wall fabric. In London’s housing stock, the most common causes are failed pointing in solid brick walls, cracked render on Victorian and Edwardian terraces, failed cavity trays above window lintels, and deteriorated window seals or flashings. It typically presents as an irregularly shaped damp patch that expands after rain and may partially dry between wet periods — quite different from the uniform, widespread surface moisture of condensation.
Failed cavity wall insulation is an increasingly common and underdiagnosed cause of persistent damp in post-1930s properties. Blown-fibre or polystyrene bead insulation from the 1980s and 1990s can degrade, settle, or become saturated, effectively bridging rainwater from the outer leaf to the inner leaf. A homeowner in Lewisham contacted us after discovering a sodden, discoloured patch behind her bedroom wardrobe — she had assumed it was condensation for years. Our survey revealed that the original cavity insulation had settled into an uneven mass channelling rainwater directly to the inner leaf, concealed entirely by the wardrobe until she moved it to redecorate.
A missing or bridged damp proof course (DPC) introduces rising damp — groundwater wicking upward through masonry via capillary action. It is most common in properties predating the routine installation of DPCs (broadly pre-1875 construction), or where external ground levels have been raised above the DPC line. It is characterised by a tide mark at roughly 900mm to 1,200mm above floor level, salt staining on the plaster, and damp that does not respond to ventilation or heating alone. Distinguishing between condensation, penetrating damp, and rising damp requires a proper survey using a calibrated moisture meter — treating the wrong type is expensive.
How Fixiz solves wardrobe mould — diagnosis first, then the right fix for your wall type
We have attended enough mould-behind-wardrobe jobs across London — from Victorian terraces in Peckham to 1960s maisonettes in Walthamstow — to be confident that the single biggest mistake in this area is skipping diagnosis and going straight to a fix. The second biggest mistake is choosing the cheapest fix rather than the right one. Both approaches cost more in the long run.
Our process starts with a structured site assessment. We check the wall construction type (solid brick, cavity brick, timber frame, concrete panel), measure wall surface temperatures and ambient humidity, probe for moisture at multiple heights and locations, and inspect the external wall face wherever accessible. This gives us a clear picture of what is causing the problem before we discuss any remediation.
For condensation cases in solid-wall properties — the most common scenario in pre-war London housing — our standard recommendation is internal wall insulation using PIR-backed thermal board, combined with a 50mm ventilated standoff for the wardrobe and ventilation slots in the wardrobe panels. We specify the correct vapour control layer to prevent interstitial condensation, and we ensure the insulation returns around window reveals and floor junctions to eliminate cold bridges — which are often the points where mould persists even after a partial insulation job.
For cavity wall properties where insulation has failed, we coordinate extraction and re-injection with modern EPS bead. For properties with penetrating damp, we work from the outside — repointing, re-rendering, or repairing flashings and cavity trays — before any internal work begins. For rising damp cases, we install or reinstate a DPC and replaster with renovation plaster to the appropriate height.
We are always transparent about cost and disruption. Internal wall insulation requires the wardrobe to be temporarily removed, skirtings and sockets to be re-fixed, and the affected walls redecorated — typically two to three days per room. We project-manage the full scope so the homeowner is not left coordinating multiple contractors.
Frequently asked questions
Is mould behind a wardrobe always caused by condensation?
Not always, but condensation is the most common cause by a significant margin — particularly in pre-1945 properties with solid brick external walls. Penetrating damp and rising damp can also cause mould behind furniture and require entirely different remediation approaches. A proper survey using a moisture meter and external inspection is the only reliable way to distinguish between them. Treating without a diagnosis risks spending money on the wrong fix.
Will leaving a gap behind the wardrobe solve the problem on its own?
In properties with modern cavity insulation, a 50 to 75mm standoff gap combined with ventilation slots may be sufficient. In solid-wall properties — Victorian and Edwardian terraces in particular — the wall surface can drop so far below the dew point in winter that a gap alone will not prevent condensation forming. Internal wall insulation is usually necessary in those cases to address the root cause.
How much does internal wall insulation cost for a bedroom in London?
Insulating one bedroom external wall in a London terraced house — including removing and reinstating a fitted wardrobe, applying PIR-backed thermal board, re-fixing skirtings and sockets, and plastering — typically falls in the range of £800 to £1,800 depending on complexity. This is significantly more than a dehumidifier or a mould clean, but it is a permanent fix rather than an annual maintenance cost. We provide detailed quotes following a site visit.
Can I install insulated plasterboard myself?
The materials are available to DIY enthusiasts, but the critical details are the vapour control layer and the treatment of junctions — reveals, floor edges, ceiling edges, and pipe penetrations. If these are poorly executed, interstitial condensation can develop within the wall buildup, leading to damp that is worse than the original problem. We always recommend professional installation for external wall insulation.
Does mould behind a wardrobe affect health?
Yes. Cladosporium, Aspergillus, and Penicillium — the most common species found in these situations — produce spores that circulate in indoor air and can aggravate asthma, rhinitis, and other respiratory conditions, particularly in children, elderly residents, and anyone with a compromised immune system. A fitted wardrobe full of clothes acts as a filter for those spores, meaning the clothing itself can become contaminated. Resolving the mould at source is not just a property maintenance issue — it is a health matter.
Ready to move from confusion to construction? Get in touch with Fixiz today for a no-pressure chat about your project and the fastest route to full compliance.