Physical address:
128 City Road, EC1V 2NX, London,UK
There is a particular kind of worry that comes with a smell you cannot see — and if you have noticed a musty smell under floorboards returning each spring or lingering through autumn, you are far from alone. In our experience assessing properties across London and the South East, this is one of the most commonly misunderstood damp problems homeowners face, and one of the most preventable. It is almost always rooted in the sub-floor void beneath suspended timber floors — a hidden environment most homeowners never think about until something goes wrong.
Why Suspended Timber Floors Develop a Musty Smell
The majority of pre-1960s UK homes — Victorian terraces, Edwardian semis, interwar bungalows — were built with suspended timber floors. Rather than sitting on a solid concrete slab, the ground-floor joists span between sleeper walls, leaving a ventilated void beneath them. When that ventilation fails or is never adequate, moisture accumulates and the musty odour is the first signal that conditions below have turned hostile to timber.
Several mechanisms are usually at work simultaneously.
- Ground moisture evaporating into the void: Bare earth or an unprotected concrete oversite continuously releases water vapour upward. Without airflow to carry it away, humidity in the void rises and the joists, sleeper wall plates, and underside of floorboards begin absorbing it. No leak is required — evaporation alone can sustain damaging moisture levels year-round.
- Blocked or insufficient air bricks: Air bricks set into the external walls are the primary ventilation mechanism for the sub-floor void. UK Building Regulations (Approved Document C) require openings of at least 1,500mm² per metre run of external wall, or 500mm² per square metre of floor area, whichever is greater. In practice, these bricks get blocked by soil build-up, render, plant growth, or debris. Even a single blocked brick on one side disrupts the entire crossflow.
- Poor crossflow ventilation: Air bricks on one face only are not sufficient — air must flow through the void from side to side. Sleeper walls need honeycomb gaps to allow air to pass. If those gaps are absent or filled with rubble, pockets of stagnant, humid air form even when the external bricks appear clear.
- Debris in the void: Builders’ rubble, fallen insulation, leaves, and organic waste accumulate over decades. We have opened sub-floor voids in London properties and found enough material to almost entirely seal the ventilation paths. That debris traps moisture and feeds mould growth directly.
- Plumbing leaks beneath the floor: Water and waste pipes often run through the void. A slow leak from a corroded joint introduces liquid water — a far more aggressive moisture source than evaporation. The smell from a plumbing leak is usually sharper and more persistently damp rather than earthy.
Tip: If the smell is strongest directly beneath a bathroom or kitchen, or if there is discolouration at skirting board level in a specific area, a plumbing leak beneath the floor should be ruled out before assuming the problem is purely ventilation.
Seasonal Patterns — Why Spring and Autumn Are Worse
One of the most consistent patterns we hear is that the musty smell under floorboards peaks in spring — particularly March and April — and returns in autumn around October. This is not coincidence. It is a condensation cycle driven by temperature change in the sub-floor void.
During winter, the ground beneath the floor is cold and the air in the void holds little moisture. When outdoor temperatures rise in spring, the ground warms far more slowly than the air above. Warmer external air — which carries significantly more water vapour than cold air — enters the void through the air bricks and meets the cooler ground surface. That moisture condenses onto the cooler surfaces: the ground, the sleeper walls, and sometimes the joists themselves. Humidity in the void spikes sharply, mould and fungi become active and release volatile organic compounds, and those compounds rise through gaps in the floorboards into the living space above.
The autumn pattern follows the same logic in reverse, as warm damp summer air gives way to cooler conditions. Homes with adequate ventilation manage these transitions without any noticeable effect. Homes with blocked or insufficient air bricks cannot flush the humid air out fast enough, and the seasonal smell becomes a reliable annual event.
Many homeowners treat this as a weather nuisance — open windows, wait for it to pass. But each seasonal condensation cycle deposits a little more moisture into the timber, incrementally raising its moisture content. Over years, what begins as a ventilation problem can become a structural one. The smell is not the problem itself; it is the early warning of conditions that, unchecked, lead to rot.
What You Can Check Yourself
There is a practical first inspection any homeowner can carry out before engaging a professional. It costs nothing other than twenty minutes and a torch, and it often reveals whether you have a straightforward ventilation problem or something more complex.
- Locate and inspect the external air bricks: Walk around the outside of the property at ground level. Air bricks are the terracotta or plastic grilles set into the wall below internal floor level. Check each one is clear of soil, render, plant growth, and debris. Clear any obstruction carefully without damaging the surrounding mortar.
- Check for crossflow: Are there air bricks on at least two opposing external walls? If ventilation exists on one side only, there is no meaningful crossflow regardless of how clear the individual bricks are.
- Check ground levels outside: If paving, decking, or raised beds sit level with or above the air bricks, the ventilation path is compromised at source. This is extremely common in gardens where landscaping has been added without considering the air bricks.
- Inspect skirting boards at floor level: Kneel and look closely at the junction between the skirting and the floor. Tide marks, paint bubbling, staining, or softness to the touch suggest the void below is wet enough to be affecting the edges of the structure. Press along the skirting at floor level — sponginess or movement is a concern.
- Test for airflow at the vents: Remove one air brick grille on a cool morning and hold a thin strip of tissue at the opening. In a void with working crossflow, you will feel a gentle movement of air. No movement — or air blowing in from both sides simultaneously — indicates crossflow is absent.
If your checks reveal nothing more serious than blocked air bricks and clear timbers, addressing the ventilation may be something you can manage directly. If you find soft skirting boards, discolouration, or a persistent smell despite clear air bricks, a professional assessment is the right next step.
What a Professional Assessment Involves
A thorough professional investigation of a suspected sub-floor void problem goes considerably further than a visual check through an air brick opening. At Fixiz, we use a structured approach that avoids unnecessary disruption to finished floors while giving us a clear picture of what is happening below.
- Endoscope inspection: A small camera is inserted through an air brick aperture or a minimal access point to view the void directly — the ground surface, sleeper walls, joists, and any debris — without lifting the floor. This is often the single most informative tool available, and it avoids damage to flooring that may be in perfectly good structural condition.
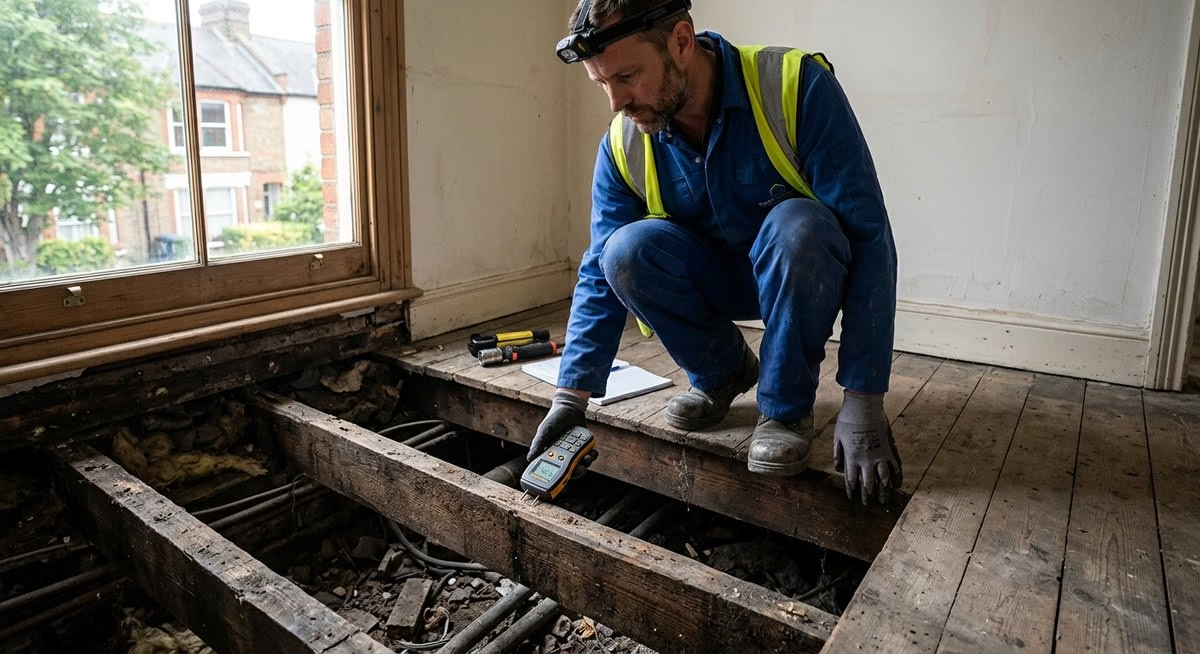
- Moisture mapping at floor and skirting level: Using a calibrated moisture meter, we take readings at multiple points around the room perimeter and across the floor surface. Elevated readings distributed around all edges indicate a generalised ventilation problem. Concentrated elevated readings point toward a localised source such as a leak or a specific blockage.
- Ventilation calculation: We measure the property and calculate what provision the void requires under Approved Document C and NHBC Standards 5.2.10, then compare that with the actual provision — the number, size, and condition of existing air bricks — to establish whether the ventilation is structurally adequate or fundamentally insufficient.
- Timber moisture content assessment: Where the void is accessible, direct readings from the joists and plates are taken. Timber below 18% moisture content is generally considered safe. Above 20%, conditions favour fungal activity. Above 28%, active wood-rotting fungi can establish and cause structural damage.
We document all of this with photographs, including endoscope footage, so that the homeowner has a clear record of conditions beneath the floor and can understand the basis for any recommended remediation.
When a Musty Smell Signals a Serious Problem — and What to Do About It
For many homes, a musty sub-floor smell is caught at an early stage, when the structure is still sound and the fix is straightforward. But the same conditions, left unaddressed, produce serious structural damage. The three forms of decay we are most concerned about in sub-floor voids are wet rot, dry rot, and joist end rot.
Wet rot — typically Coniophora puteana — attacks timber consistently moist above 30% moisture content. Wood darkens, softens, and crumbles when dry. Signs above the floor include a bouncy feel underfoot, floorboards that have dropped away from skirting boards at the edges, and increasing creaking. Dry rot — Serpula lacrymans — is more feared because it spreads through masonry as well as timber. It produces white mycelium growth, a distinctive mushroom-like smell, and cuboid-crumbling timber, and it can travel several metres from its moisture source. A poorly ventilated sub-floor void is one of its most favoured environments. Joist end rot is often missed because the visible central span of a joist can appear sound while the ends — resting on damp sleeper wall plates or on external walls — are already severely compromised.
Tip: If your floor has developed a noticeably bouncy feel or a new persistent creak that has worsened over months, do not defer getting it assessed. Joist damage accelerates once timber moisture content reaches damaging levels, and the cost difference between early and late intervention is significant.
The range of fixes depends entirely on what the assessment finds. Clearing blocked air bricks is the lowest-cost, highest-impact intervention and may be sufficient where the void is otherwise in good condition and the ventilation meets the regulatory minimum. Where the provision is genuinely insufficient, additional air bricks need to be formed through the external wall — a straightforward job when specified correctly, with corresponding ducting to route air beneath the floor. Installing a ground membrane — a vapour control layer laid across the earth or oversite — dramatically reduces ground evaporation and is often combined with improved air brick provision rather than used instead of it. Where passive crossflow is genuinely impossible to achieve due to the property’s layout, low-powered mechanical sub-floor ventilation controlled by a humidistat can maintain safe humidity levels in the void. Where rot has been found, affected timber must be replaced — not treated in place — and the moisture source must be eliminated before new treated timber is installed.
One question we are frequently asked is whether homeowners should lift floorboards themselves to investigate. If the floor is traditional softwood boarding with exposed nail heads, carefully lifting one board at the end of a run is reasonable. However, if the floor is engineered hardwood, solid hardwood glued down, underfloor-heated, or any form of click-fit system, lifting boards yourself risks causing irreparable damage that costs far more to repair than a professional inspection. When in doubt, commission an endoscope inspection first — in many cases we can provide a complete picture of sub-floor conditions without touching the finished floor at all.
Frequently Asked Questions
Is a musty smell under the floorboards always a sign of damp?
Almost always. The smell is produced by microbial activity, and the microbes responsible require moisture. The source may be ground evaporation, condensation in the void, or a plumbing leak — but some form of excess moisture is almost invariably involved. If the smell is persistent or worsening year on year, it warrants proper investigation rather than seasonal airing.
Can I fix the problem by running a dehumidifier in the room?
No. A dehumidifier in the living space treats the symptom — the smell rising through floor gaps — not the problem. The void beneath the floor will continue to accumulate moisture regardless of conditions in the room above. The only effective solution is to address moisture at source in the void itself through better ventilation, a ground membrane, or eliminating a leak.
My surveyor said the air bricks are clear — so why do I still have a smell?
Clear air bricks are necessary but not sufficient. The question is whether there is effective crossflow through the whole void. Sleeper walls without adequate honeycomb openings, a void full of debris, or a layout that prevents air from connecting across the property will all block meaningful ventilation even when the individual air bricks are spotlessly clear. An endoscope inspection typically reveals exactly this problem.
How much does it cost to fix a sub-floor ventilation problem?
The range is wide, which is why assessment comes first. Clearing blocked air bricks costs very little. Adding new air bricks typically runs to several hundred pounds per vent including materials. A ground membrane installation for a moderate-sized room is usually in the region of £800–£2,000 professionally installed. Mechanical ventilation systems sit in a similar range. Structural timber remediation, if rot is found, varies considerably depending on extent. A thorough assessment before any commitment to remediation is always the right starting point.
Does the smell mean I definitely have rot in my joists?
Not necessarily. Mould on the ground surface, elevated void humidity, and even a temporarily raised water table all produce a musty smell without any joist rot being present. However, the conditions causing the smell are the same conditions that lead to rot if left long enough. The smell is a warning that conditions are wrong — not a confirmation that structural damage has already occurred. Investigating promptly keeps your options open.
Ready to move from confusion to construction? Get in touch with Fixiz today for a no-pressure chat about your project and the fastest route to full compliance.