Physical address:
128 City Road, EC1V 2NX, London,UK
Plastering is a skill that transforms walls and ceilings into smooth, beautiful surfaces. Whether you’re a beginner or have some experience, mastering plastering techniques can make a huge difference. This guide will walk you through essential steps, from preparation to finishing touches, to help you achieve a flawless finish.
Key Takeaways
- Proper preparation is crucial for a smooth plastering job. Clean and repair the surface before you start.
- Mix plaster to the right consistency to ensure an even application. Follow the instructions carefully.
- Work in small sections to maintain control and achieve a uniform finish. Rushing can lead to mistakes.
- Use the right tools and keep them clean. Dirty tools can ruin your plastering work.
- Practise makes perfect. Don’t be discouraged by initial mistakes; improvement comes with experience.
Meticulous Preparation for Plastering

Proper preparation is the foundation of successful plastering. Ensuring the surface is ready can make a significant difference in the final outcome. Here are the essential steps to prepare for plastering walls or a plastering ceiling.
Cleaning and Prepping the Surface
Start by thoroughly cleaning the surface. Remove any dirt, grease, or debris. This step is crucial as it ensures the plaster adheres properly. Use a brush or vacuum to get rid of loose particles. If the surface is greasy, a mild detergent can help.
Repairing Cracks and Imperfections
Inspect the surface for any cracks or imperfections. Use a suitable filler to repair these areas. Make sure the filler is completely dry before moving on. This step helps in achieving a smooth and even finish.
Choosing the Right Filler
Selecting the appropriate filler is essential. Different fillers are available for various types of surfaces and cracks. Ensure you choose one that is compatible with the material of your wall or ceiling. This will help in maintaining the integrity of the plaster and prevent future issues.
Taking the time to prepare your surface meticulously will set the stage for a flawless finish and ensure the longevity of your plastering project.
Masterful Application Techniques
Mixing Plaster to the Right Consistency
Getting the plaster mix just right is crucial. Follow the manufacturer’s instructions for the correct ratio of plaster to water. Consistency is key; it should be smooth and lump-free. Use a mixing paddle for the best results.
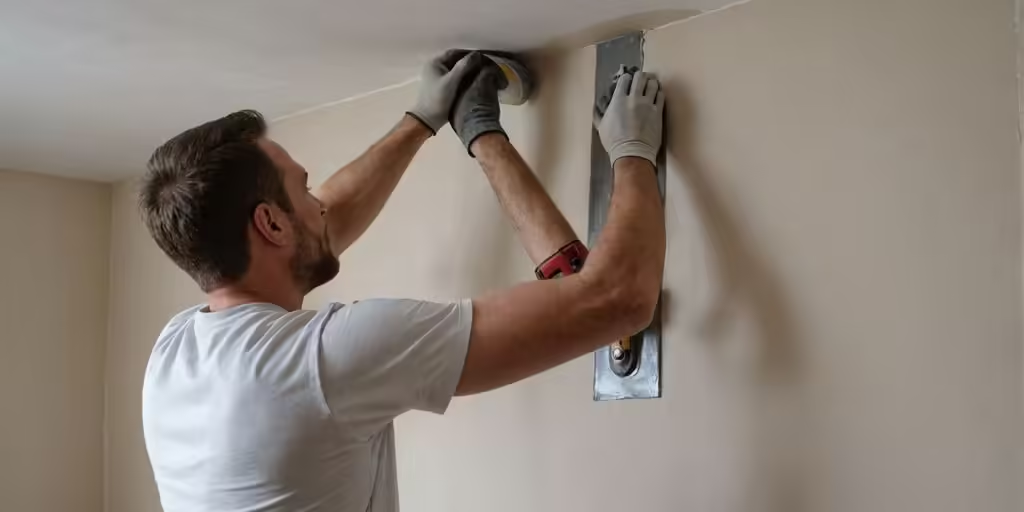
Applying Plaster Evenly
When applying plaster, use smooth, controlled movements. Work in small sections to keep the plaster from drying out too quickly. This ensures an even application and helps you maintain control over the process.
Working in Small Sections
Focus on one small area at a time. This allows you to perfect each section before moving on. It also helps in maintaining a consistent texture and finish throughout the entire surface.
Mastering these techniques will make your plastering projects look professional and last longer. Take your time and pay attention to detail, as precision is key to achieving professional results.
Essential Tools and Materials for Plastering
Before you start plastering, it’s important to have the right tools and materials. Having the proper equipment can make a big difference in the quality of your work. Here’s a breakdown of what you’ll need:
Must-Have Plastering Tools
- Plastering Trowel: Used for applying and smoothing plaster.
- Hawk: A flat board to hold plaster while you apply it to the wall.
- Mixing Bucket: For mixing plaster and water.
- Plasterer’s Float: Helps create a smooth finish.
- Jointing Knife: Ideal for smoothing plaster into tight corners.
- Plastering Tape: Reinforces joints and prevents cracking.
Selecting the Right Plaster
Different projects require different types of plaster. Here’s a quick guide:
| Type of Plaster | Best For | Advantages | Disadvantages |
|---|---|---|---|
| Gypsum Plaster | Interior walls | Quick-drying, easy to work with | Not suitable for high-moisture areas |
| Lime Plaster | Historic buildings, eco-friendly projects | Breathable, allows moisture to escape | Takes longer to set |
| Cement Plaster | Exterior walls, high-moisture areas | Very durable, water-resistant | More difficult to work with, requires more skill |
Using Primers and Bonding Agents
Primers and bonding agents are essential for ensuring that plaster adheres properly to surfaces. They help create a stable base, making your plastering job more durable and long-lasting.
Proper preparation and the right materials are key to achieving a flawless finish. Make sure to follow the ultimate guide to plastering materials for the best results.
Advanced Plastering Techniques
Skimming for a Smooth Finish
Skimming is a technique used to create a smooth, polished finish on walls and ceilings. To achieve this, apply a thin coat of plaster with a trowel and use a float to smooth it out. This method is ideal for covering minor imperfections and providing a perfect base for painting or wallpapering.
Creating Textured Finishes
Textured finishes add visual interest and depth to your walls. Use tools like sponges, brushes, or rollers to create patterns in the wet plaster. This technique allows for creativity and can transform a plain wall into a feature piece.
Repairing Damaged Plaster
For plastering repairs, start by cleaning the damaged area thoroughly. Apply a bonding agent, then fill the area with plaster and smooth it out. This method is effective for fixing cracks, holes, or uneven surfaces, ensuring a seamless plastering finish.
Mastering these advanced techniques can elevate your plastering projects, making them look professional and polished. Whether you’re working on plastering patches or entire walls, these methods will help you achieve the best results.
Elevating Your Finish with Final Touches
Smoothing and Polishing Techniques
To achieve a flawless finish, it’s essential to focus on smoothing and polishing. Start by using a clean trowel to smooth out any imperfections. Make sure to keep the trowel clean to prevent plaster build-up, which can affect its effectiveness. Apply even pressure throughout each stroke, using your wrist and arm to control the movement. This will help you achieve a seamless finish.
Adding Decorative Elements
Adding decorative elements can elevate your plastering project from good to exceptional. Experiment with different techniques such as texture or stencilling to add depth and character to your design. Don’t be afraid to get creative and let your imagination run wild—the possibilities are endless.
Inspecting and Correcting Imperfections
After the plaster has dried, inspect the surface for any imperfections. Use a fine-grit sandpaper to smooth out any rough spots. If you find any cracks or holes, fill them in and smooth the area again. This final inspection ensures that your plastering project looks professional and polished.
Common Mistakes and How to Avoid Them
Avoiding Over-Application
Applying too much plaster can lead to uneven surfaces and longer drying times. It’s best to apply plaster in thin, even layers and build up gradually. This approach ensures a smoother finish and reduces the risk of cracks.
Ensuring Proper Surface Preparation
Not preparing the surface properly can cause plaster to peel or crack. Always clean and prep the surface before starting. This step is crucial for a durable and flawless finish.
Maintaining Consistent Mixing
Inconsistent mixing results in a rough, uneven finish. To avoid this, ensure a consistent, lump-free mix by following the recommended ratios and mixing thoroughly. Proper mixing is key to achieving a professional look.
Tips for Achieving a Professional Finish

Working Efficiently
To achieve a professional plastering finish, it’s crucial to work efficiently. Plastering is a time-sensitive process, so working in small, manageable sections ensures you can apply, smooth, and polish the plaster before it dries. This method helps maintain a consistent finish and prevents the plaster from setting too quickly.
Keeping Tools Clean
Clean tools are essential for a smooth plaster finish. Regularly clean your trowel and hawk to prevent dried plaster from sticking and causing imperfections. A clean tool allows for better control and a more even application. Remember, a clean trowel is key to a flawless finish.
Practising Patience and Precision
Patience and precision are vital in plastering. Rushing the job can lead to uneven layers and a rough finish. Take your time to apply each coat smoothly and evenly. Practising your technique will improve your skills over time, leading to a more professional result.
Consistent practise and attention to detail are the cornerstones of mastering plastering.
By following these tips, you can achieve a professional-quality plaster finish that enhances the beauty and durability of your projects.
Conclusion
Mastering the art of plastering is a journey that requires patience, practise, and attention to detail. By preparing your surfaces meticulously, applying plaster with precision, and adding those final finishing touches, you can achieve a flawless finish that transforms any space. Remember, the key to success lies in using the right tools and techniques, and never being afraid to experiment and learn from each project. Whether you’re a DIY enthusiast or a budding professional, keep honing your skills and let your creativity shine. Happy plastering!
Frequently Asked Questions
Why is surface preparation important in plastering?
Proper surface preparation ensures the plaster adheres well and lasts longer. Cleaning the surface and repairing cracks or holes creates a smooth base for the plaster.
How do I mix plaster to the right consistency?
Follow the manufacturer’s instructions for the correct ratio of plaster to water. Stir until the mixture is smooth and free of lumps.
What tools do I need for plastering?
Essential tools include a plastering trowel, hawk, mixing bucket, paddle, and a float. Having the right tools makes the job easier and helps achieve a smooth finish.
How can I avoid common plastering mistakes?
Avoid applying too much plaster at once, always prepare the surface properly, and ensure the plaster mix is consistent. These steps help prevent uneven surfaces and cracks.
What are some advanced techniques for a professional finish?
Advanced techniques include skimming for a smooth finish, creating textured designs, and repairing damaged plaster. These methods add a professional touch to your work.
How do I smooth and polish plaster?
Once the plaster is almost dry, use a clean trowel to smooth the surface with gentle, circular motions. Keep the trowel slightly damp to prevent sticking.