Physical address:
128 City Road, EC1V 2NX, London,UK
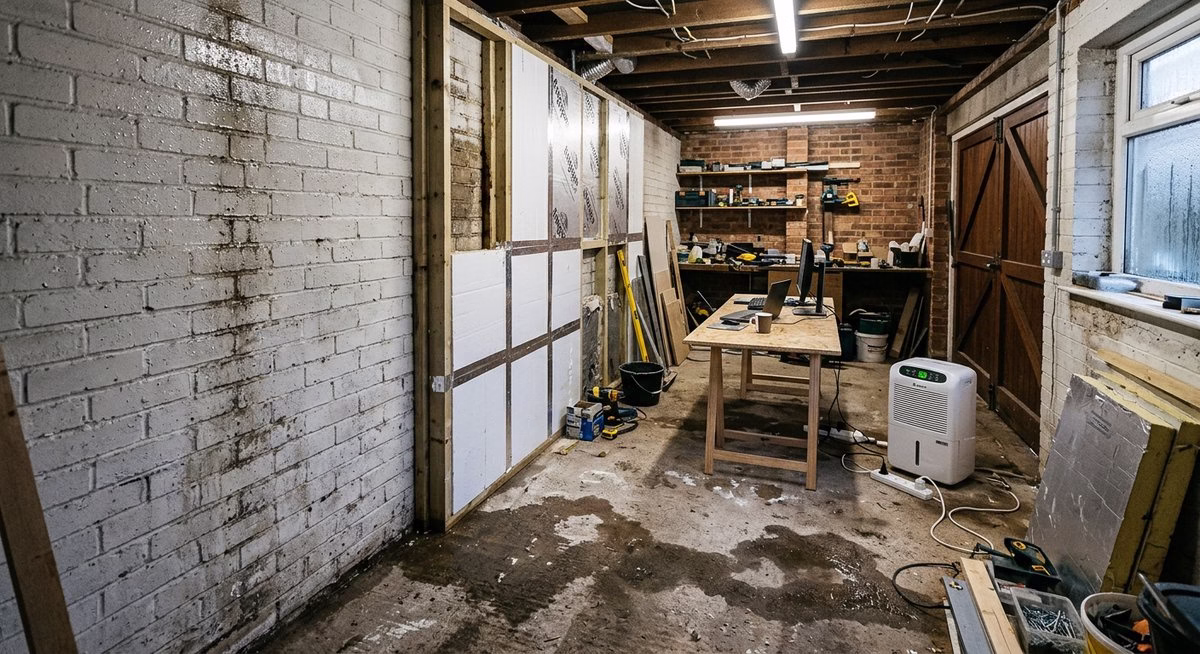
You insulated the walls, sealed the old garage door opening, and plugged in a fan heater — yet every morning the back wall is dripping wet and there’s a musty smell you can’t shift. If that sounds familiar, you’re dealing with garage conversion condensation UK homeowners encounter the moment they try to turn a cold, single-skin space into a gym, office, or playroom. The good news is that condensation in a garage conversion is entirely fixable — but only if you tackle the causes in the right order. At Fixiz, we see this pattern several times a month. The solution is never just “more insulation” or “buy a dehumidifier” — it’s a system of ventilation, insulation, vapour control, and heating designed together.
What causes condensation in a garage — and why one wall always gets wet
Condensation happens when warm, moisture-laden air meets a surface that sits at or below the dew point — the temperature at which water vapour in the air turns back into liquid. Think of a cold glass of water “sweating” on a warm day — the same physics applies to your garage walls.
In an unconverted garage, this rarely matters because air circulates freely through gaps around the up-and-over door and airbricks. Once you seal those gaps and heat the space — especially during a gym session where you’re breathing hard and sweating — you dramatically increase the moisture content of the air while removing the ventilation that used to carry it away.
The reason one wall is typically worse than the others is simple: it’s the coldest surface. In many UK homes, the garage shares one wall with a heated room (a kitchen, utility, or sunroom), meaning three walls are exposed to outside air. The wall facing north or most exposed to wind and rain will have the lowest surface temperature — and that’s where condensation settles first. We’ve attended dozens of call-outs in south-east London where the homeowner assumed the wet wall was “letting water in” when it was actually condensation caused by a temperature difference of just a few degrees. A single adjoining sunroom can be enough to warm one side of the shared wall, causing moisture to condense on the cooler garage face.
Tip: A quick way to check whether you’re dealing with condensation or penetrating damp is to tape a sheet of kitchen foil to the wet wall and leave it for 48 hours. If moisture forms on the room-facing side of the foil, it’s condensation. If it forms behind the foil (against the wall), moisture is coming through the masonry.
The retrofit plan — ventilation first, then insulation, then heating
One of the biggest mistakes homeowners make is jumping straight to insulation. Insulation is critical, but installing it before you’ve addressed ventilation and vapour control is a recipe for hidden mould. Think of it as a three-step sequence, each layer depending on the one before it.
Step 1 — Establish ventilation
Before you board a single wall, you need a plan for how moist air will leave the room. Under Approved Document F, a habitable room in a multi-storey dwelling needs at least 8,000 mm² of trickle ventilation — typically built into the head of a new window frame — plus purge ventilation via an openable window with an area of at least 1/20th of the floor area. For a single-storey building, trickle ventilation increases to 10,000 mm² equivalent area.
In practical terms, your garage conversion needs at least one window that opens — not just a pane of glass set into the old door opening — plus trickle vents in the frame. Even without a bathroom, we often recommend a low-speed continuous extractor in garage conversions because moisture loads from exercise or drying coats can be surprisingly high.
Step 2 — Insulate and add vapour control
Once ventilation is sorted, you can insulate. Under the current Approved Document L (conservation of fuel and power), a garage conversion is classified as a change of energy status — the space is moving from unheated to heated. New thermal elements must achieve the following U-values:
- Walls: 0.18 W/m²K for new elements (or 0.30 W/m²K if you’re renovating an existing wall with internal or external insulation).
- Floor: 0.18 W/m²K for a new element, or 0.25 W/m²K for a renovated existing floor.
- Roof / ceiling: 0.15 W/m²K for a new element, or 0.16 W/m²K for a renovated element at ceiling level.
For a typical single-skin brick garage wall, you’ll need roughly 70–90 mm of PIR rigid insulation board fitted between or over timber studs. The critical detail is the vapour control layer (VCL). In the UK climate, the VCL must go on the warm side of the insulation — between the insulation and the plasterboard, facing into the room. If you put it on the cold side, warm moist air passes through the plasterboard, hits the cold VCL, and condenses inside the wall. We always tape every seam with aluminium foil tape to create a continuous barrier.
Tip: Leave a small air gap (15–25 mm) between the studs and the brickwork. This lets any moisture that reaches the cold wall drain or evaporate rather than sitting trapped against the timber. A breathable membrane on the cold side of the air gap is something Building Control inspectors increasingly expect to see.
Step 3 — Add efficient, appropriate heating
Insulation slows heat loss; it doesn’t generate heat. You still need a heat source to keep surface temperatures above the dew point. An electric panel radiator, infrared panel, or — ideally — an extension of the central heating system keeps temperatures stable.
Avoid portable gas or paraffin heaters. They produce roughly one litre of water vapour for every litre of fuel burned, making condensation far worse. We’ve attended properties in Lewisham and Croydon where a single portable gas heater was the sole cause of condensation in an otherwise well-insulated room.
Common mistakes that create hidden mould
The mistakes we see most often relate to moisture management rather than structural issues. They’re easy to make — even some “professional” jobs get these wrong — and the consequences don’t show up for months.
- Insulating without ventilation: Sealing up a space and packing it with insulation board traps moisture inside. Without a route for humid air to escape, condensation forms between the insulation and the cold masonry — invisible until the plasterboard starts to stain or the timber studs rot.
- Vapour barrier on the wrong side: As discussed above, the VCL must be on the warm (room) side. Placing it against the cold brick wall — a mistake we’ve seen on multiple “professionally done” garage conversions — traps moisture within the insulation layer and accelerates mould growth.
- No air gap behind studwork: Battening PIR insulation directly onto a single-skin wall with no air gap and no breathable membrane means any moisture that migrates through the brickwork has nowhere to go. Over time, the timber studs absorb it and begin to decay.
- Skipping the floor DPM: The existing garage slab was likely poured without a damp-proof membrane. Laying insulation and a floating floor directly onto it wicks moisture up through the concrete, soaking the insulation from below. The result is a cold, damp floor and eventually mould beneath the boards.
- Using the wrong heater: Portable gas heaters, as mentioned above, pump water vapour into the space. Even a dehumidifier alone won’t solve the problem if the fundamental insulation and ventilation are absent — it’s treating the symptom, not the cause.
In roughly half the jobs we quote, the homeowner has already attempted at least one of these steps in the wrong order. The remedial work starts with carefully stripping back what’s there to inspect the masonry, timber, and existing membranes.
How to spec a build-up that meets UK Building Regulations
A compliant garage conversion is a layered system addressing moisture, thermal performance, ventilation, fire safety, and electrics. Here’s what a typical wall and floor build-up looks like.
Wall build-up (inside to outside)
- Plasterboard: 12.5 mm standard or moisture-resistant board, skimmed or taped and jointed.
- Vapour control layer (VCL): Polythene sheet or foil-backed membrane, lapped and taped at all joints.
- Insulation: 70–90 mm PIR board (depending on product lambda value) fitted tightly between timber studs (typically 75 mm or 100 mm CLS timber).
- Air gap: 15–25 mm ventilated gap.
- Breathable membrane: Such as Tyvek or equivalent, stapled to the back of the studs.
- Existing single-skin brickwork.
This targets a wall U-value of around 0.18–0.25 W/m²K. Your Building Control officer will confirm the exact requirement based on whether the element is treated as “new” or “renovated.”
Floor build-up (top to bottom)
- Finished floor: Engineered timber, laminate, or vinyl — whatever suits the room’s purpose.
- Substrate: 18 mm chipboard or a 65–75 mm sand-and-cement screed with reinforcement mesh.
- Insulation: 75–100 mm PIR rigid board to achieve a U-value of 0.18–0.25 W/m²K.
- Damp-proof membrane (DPM): 1200-gauge polythene sheet, lapped at joints by at least 150 mm and turned up at the walls to meet the wall DPC. A liquid-applied DPM is also acceptable on an existing concrete slab.
- Existing concrete slab.
The DPM is non-negotiable. Even if the slab looks dry, moisture vapour migrates through unprotected concrete over time. If you’re building a suspended timber floor instead (to match a higher internal floor level), you’ll need at least 150 mm clearance beneath the joists, a DPC under the timber, and cross-ventilation via air vents on opposite walls.
Tip: If the existing garage floor sits lower than the main house floor — as it often does — building up with insulation and screed is the most common way to match levels. Check that the finished floor height doesn’t block existing airbricks; if it does, those vents must be extended through the new floor.
‘Usable room’ versus a Building Regs-compliant habitable room
This distinction trips up a huge number of homeowners. In practice, many people convert a garage into a gym or office without applying for Building Regulations approval. They insulate a few walls, lay a floating floor, and start using the space — and no one from the council knocks on the door.
However, that “usable room” is not legally a habitable room. A garage conversion is a change of use, and the new space must comply with Parts L, F, B, C, and P of the Building Regulations. Without a completion certificate, the room technically remains a garage in law.
The practical consequences are significant:
- Resale value: When you sell your home, a solicitor’s search will flag the absence of a completion certificate. The buyer may demand a discount, an indemnity policy, or even insist on remedial works before proceeding. Estate agents must describe uncertified rooms carefully — a “gym room” rather than a “bedroom” or “study.”
- Insurance: If your home insurance policy doesn’t know about the conversion, a claim related to that room (fire, flood, structural damage) may be refused.
- Safety: Fire safety provisions (smoke detection, fire-rated doors, escape routes) and electrical safety (Part P compliance) exist for good reason. An uncertified conversion may lack all of these.
Our strong advice is to get Building Regulations approval. A Building Notice application costs a few hundred pounds, and the inspection visits help ensure the work is done correctly. The definition of “habitable room” varies slightly across Approved Documents, but the core requirement is the same: the room must meet current standards for insulation, ventilation, moisture resistance, fire safety, and electrics. At Fixiz, we handle the Building Control process as part of every garage conversion, so you don’t need to navigate these definitions alone.
How Fixiz keeps your garage conversion dry and compliant
We approach every garage conversion as a moisture-management project first and a construction project second — ventilation strategy, then insulation and vapour control, then heating.
- Initial survey: We check the existing slab for moisture, inspect the brickwork for penetrating or rising damp, assess the roof, and note any existing ventilation.
- Design and specification: We produce a build-up meeting current Part L, Part F, and Part C requirements, then submit it to Building Control.
- Build: DPM, insulation, VCL, and studwork installed in the correct order with photographic evidence at each stage. Every joint taped, every membrane lapped, every air gap maintained.
- Handover: You receive a completion certificate confirming the room is a legally habitable space — not just a “garage with plasterboard.”
We’ve completed garage conversions across London and the Home Counties, turning dripping single-skin garages into warm, dry offices, gyms, and playrooms — all fully signed off. Whether you’re starting from scratch or fixing a previous attempt, we survey the space, diagnose the moisture source, and design a build-up that solves the problem permanently.
Frequently asked questions
Will a dehumidifier fix condensation in my garage conversion?
A dehumidifier reduces moisture temporarily but doesn’t address the root cause. If the space lacks insulation and ventilation, the dehumidifier is fighting a constant supply of moisture from cold masonry, an unprotected slab, and daily use. Fix the insulation, vapour control, and ventilation first — then use a dehumidifier as a backup if needed.
Can I insulate a single-skin garage wall from outside instead?
External insulation is technically ideal because it keeps the brickwork warm and moves the dew point outside the wall structure. However, it changes the building’s appearance, may need planning permission, and costs significantly more. For most UK garage conversions, internal insulation with a proper air gap, breathable membrane, and VCL on the warm side is the standard, cost-effective approach.
Do I need Building Regulations approval if I’m just using the garage as a gym?
Strictly speaking, yes — if you’re insulating, heating, and using the space as a room, you’re changing its energy status. In practice, many homeowners skip the approval and use the space informally. But without a completion certificate the room is not legally habitable, which causes problems when selling or making an insurance claim. We always recommend going through the process — the cost is modest and the benefits are substantial.
How much does it cost to convert a garage and fix condensation issues?
A straightforward single-garage conversion — including insulation, floor build-up with DPM, new window, studwork, plastering, electrics, and Building Control fees — typically costs £7,000–£15,000 depending on scope. If a previous conversion needs stripping back, remedial costs can add £2,000–£5,000. At Fixiz, we provide a detailed, itemised quote after our initial survey.
What U-values do I need for a garage conversion in the UK?
Under the current Approved Document L (2021 edition, in force since June 2022), new thermal elements should achieve wall 0.18 W/m²K, floor 0.18 W/m²K, and roof 0.15 W/m²K. If you’re renovating an existing element, the targets are slightly more relaxed — 0.30 W/m²K for walls and 0.25 W/m²K for floors. Your Building Control officer will confirm which targets apply.
Ready to move from confusion to construction? Get in touch with Fixiz today for a no-pressure chat about your project and the fastest route to full compliance.