One of the most common questions we hear from homeowners and tradespeople planning a bathroom renovation is whether they need to waterproof before tiling — and if so, how much of the wall and floor needs treatment. The short answer is: yes, bathroom tanking and waterproofing before tiling is essential in any area subject to regular water contact, and the mistakes made at this stage are the leading cause of leaks behind tiles, failed adhesive, and the kind of damage that only becomes visible months or years after the tiles go on. This guide covers exactly where to waterproof, which products work, and the errors that turn a beautiful bathroom into an expensive problem.
What is bathroom tanking — and why it matters
Tanking is the application of a continuous waterproof membrane or coating to a substrate — usually walls and floor — before tiling. The goal is to create a barrier that prevents water from passing through the tile and grout into the substrate (which is typically plasterboard, plywood, or a timber or block wall) and from there into the structure behind it.
Tiles and grout are not waterproof. This is one of the most persistent myths in bathroom renovation. Ceramic and porcelain tiles absorb very little water, and good quality grout is highly water-resistant — but even fully cured, correctly installed grout allows some moisture migration over time, particularly at movement joints and seams. In a shower enclosure, where water is applied daily at volume, without a waterproof membrane behind the tiles the substrate will become saturated. Saturated plasterboard loses structural integrity, becomes a mould habitat, and eventually fails — taking the tiles with it. Saturated timber framing rots. Saturated screed degrades and can allow water to penetrate to the floor structure below.
Tip: The fact that no leak appears at the ceiling below a bathroom immediately after tiling does not mean the waterproofing is adequate. Water ingress into a substrate can take months or years to saturate fully and migrate to a visible location. By the time you see a damp patch on the ceiling below, significant damage has already occurred.
Where waterproofing is required — and where it isn’t
Not every surface in a bathroom needs full tanking, but the boundaries of the waterproofed zone need to be understood and respected. Getting them wrong — either by not going far enough or by applying waterproofing inconsistently — creates weak points where water will inevitably find its way through.
The shower enclosure
The shower enclosure is the highest-risk zone in any bathroom. Walls and floor within the enclosure should be fully tanked — every surface, including the floor, the full height of the shower walls, and at least 150–200mm beyond the enclosure perimeter in all directions. The reason for extending beyond the enclosure boundary is that shower water splashes and runs, and any substrate that can be reached by water should be protected.
For a shower on a timber joist floor, the floor itself should be boarded with a moisture-resistant substrate (cement board or similar) and tanked to the same standard as the walls. A standard plywood or chipboard floor deck is not an adequate substrate for a shower floor without waterproofing — and even with waterproofing, the substrate must be adequately stiff to prevent flex, which can crack grout and allow water ingress.
The bath area
The area around a bath — typically the wall above the bath and approximately 300mm each side — should be tanked, particularly if it is tiled. The seam between the bath and the tiled wall is a critical detail: this joint is subject to movement as the bath flexes under load, and a hard grout line here will crack. The correct detail is a silicone sealant joint at this seam, applied over a correctly prepared surface, with the waterproof membrane taken down to bath level.
The silicone joint at the bath-to-wall seam is the most commonly failed waterproofing detail in UK bathrooms. It fails for two reasons: wrong product (non-sanitary grade silicone without mould inhibitor) or wrong substrate preparation (silicone applied over old silicone, soap residue, or insufficiently dry surfaces). A correctly specified and applied sanitary silicone joint at this seam, renewed every 5–7 years, is the critical maintenance item in any tiled bathroom.
The floor
The bathroom floor in a wetroom or walk-in shower must be fully waterproofed. In a conventional bathroom with a separate bath and no shower (or a shower in an enclosure), the floor is lower risk but still benefits from a waterproof membrane under the tiles — particularly on upper floors where a leak would affect the ceiling below.
- Wetroom floors: Full tanking system is mandatory, with the waterproof membrane running continuously up the walls to a minimum of 150mm above the finished floor level and ideally higher in the shower area.
- Shower tray alternatives: Where a shower tray is fitted rather than a wetroom floor, the tray itself provides the primary waterproofing — but the wall area above and around the tray still needs to be tanked.
- Floor-to-wall junction: This junction is a critical detail. The membrane must be continuous across the junction — not terminated at the floor and restarted on the wall, but carried continuously around the corner using a reinforcing tape or preformed corner piece. A break in the membrane at this junction is a direct route for water ingress.
What to waterproof with — product types and where they’re appropriate
There are several types of waterproofing system in common use for bathroom applications, and the choice affects both performance and the tile adhesive compatibility.
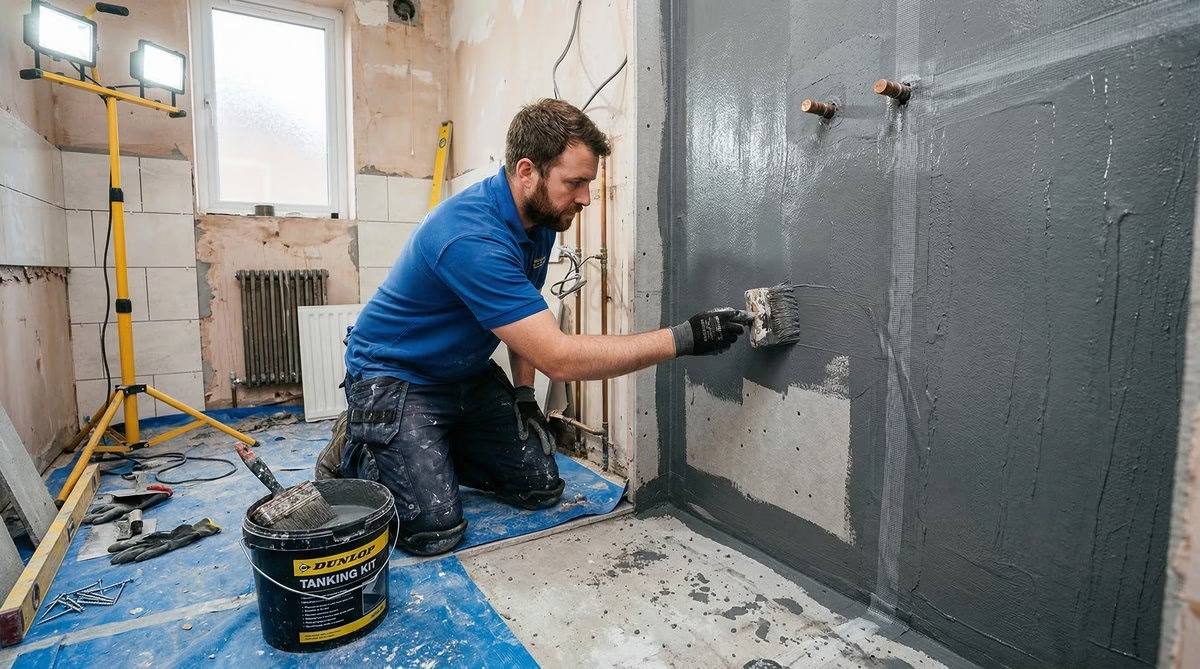
- Brush-applied liquid membranes: Products such as BAL Tanking Slurry, Mapei Mapelastic, and Wedi Subliner Dry are applied by brush or roller in two or more coats. They form a flexible, continuous film that bonds to the substrate. These are the most widely used tanking systems in the UK for retrofit bathroom renovations.
- Sheet membranes: Products such as Schluter Kerdi or Wedi board panels create a mechanical waterproof layer. They are particularly well suited to timber-framed walls and floors where flex is a concern, as they are uncoupling systems that allow some movement without cracking the tiles above.
- Cement board substrates: Boards such as Hardiebacker or Aquapanel are moisture-resistant substrates (not fully waterproof in themselves) that are used as the backing board before a liquid membrane is applied. They replace standard plasterboard in wet areas and provide a stable, dimensionally consistent substrate for tiles.
- Waterproof tile adhesive: Flexible, waterproof tile adhesive is not a substitute for a tanking system. It improves the adhesive bond and provides some moisture resistance at the adhesive layer, but it does not replace a continuous membrane behind the tiles.
Tip: Always check that your chosen tanking system is compatible with the tile adhesive and grout you plan to use. Most manufacturers publish compatibility guides, and using non-compatible products can void the warranty of both. Where in doubt, use a complete system from one manufacturer.
The mistakes that cause leaks behind tiles
Most bathroom leaks we investigate are not caused by catastrophic failure of a waterproofing system — they are caused by a small number of specific, avoidable errors in application and detailing.
- Incomplete coverage: Applying tanking only to the back wall of a shower and leaving the side walls untanked. Water runs down the side walls every time the shower is used, and the side wall substrates fail over time.
- No corner reinforcement: Applying liquid membrane across internal and external corners without a reinforcing bandage or tape. The membrane at a corner is subject to differential movement between the two surfaces and will eventually crack without reinforcement.
- Insufficient coats: Most liquid membranes require two coats to achieve the specified dry film thickness. Applying a single coat to save time results in a membrane that is thinner than designed and more susceptible to pinhole defects.
- Tiling before the membrane is fully cured: Applying tile adhesive before the liquid membrane has fully cured (typically 24 hours, sometimes longer in cold conditions) can compromise the membrane film and create adhesion problems. Read the manufacturer’s instructions and respect the curing time.
- Hard grout at movement joints: Using rigid cement grout in internal corners and at the perimeter of the floor (the floor-to-wall junction) creates a joint that cracks as the building and bathroom components move. These joints require flexible silicone sealant, not grout.
- Wrong silicone at the bath seam: Using general-purpose silicone rather than sanitary or bathroom-grade silicone with mould inhibitor at the bath-to-wall seam. Non-sanitary silicone breaks down quickly in a wet environment and becomes a mould colony within months.
Building Regulations requirements for bathroom waterproofing
In England and Wales, there is no single specific regulation that mandates bathroom tanking in all circumstances — but the building regulations do require that building work is carried out to a standard that will not cause damage to the structure or adjacent properties. A bathroom leak caused by inadequate waterproofing that damages the floor structure or the ceiling below can be considered a building regulations failure if the work was notifiable (for example, if it involved a new bathroom in a dwelling and was not exempt). Where a bathroom is in an upper floor flat or house, the obligation to protect the structure and the property below is both a regulatory requirement and a basic duty of care.
For new builds and major renovations, the structural and moisture protection requirements of Building Regulations Part C are relevant — walls and floors in wet areas must be protected against moisture penetration. A competent contractor will apply appropriate waterproofing as a matter of standard practice, regardless of whether a Building Control inspector specifically reviews the tanking installation.
How Fixiz approaches bathroom waterproofing
When we carry out bathroom renovations, waterproofing is not an optional extra or an upsell — it is part of the base specification for any tiled wet area. We use liquid membrane systems from established manufacturers, applied in the correct number of coats, with reinforcing tape at all corners and junctions, and carried to the correct height on each wall. The seam between any bath or tray and the tiled wall is always finished with sanitary silicone after tiling and grouting are complete.
If you’re taking on a bathroom renovation and want to understand whether the waterproofing specification being proposed is appropriate — or if you’ve had tiles come off a wall and want to understand why — we’re happy to give you an honest assessment.
Frequently asked questions
Do you need to tank a whole bathroom or just the shower?
The shower area must be fully tanked. The area around the bath (wall above and 300mm each side) should be tanked if tiled. The rest of the bathroom floor should be waterproofed if on an upper floor. Full bathroom tanking is best practice for any wet room conversion.
What happens if you tile without waterproofing?
Over time, water migrates through the tile adhesive and grout into the substrate. Plasterboard becomes saturated and fails. Timber framing rots. The tiles delaminate or fall off. Mould develops behind the wall. On upper floors, water can penetrate to the ceiling below. The damage is typically far more expensive to repair than the waterproofing would have cost.
Can I apply tanking over existing tiles?
Not directly — tanking must be applied to a solid, clean, stable substrate. Old tiles must be removed and the substrate assessed before tanking is applied. Some liquid membranes can be applied over existing tiles as a precautionary measure in low-risk areas, but this is not a substitute for proper substrate preparation in wet areas.
How long does bathroom tanking take to dry?
Most liquid membrane systems require 24 hours between coats and 24–48 hours after the final coat before tiling can begin. In cold or humid conditions, curing may take longer. Check the manufacturer’s technical data sheet and do not tile until the specified curing time has elapsed.
Is silicone at the bath seam really necessary if the tiles are well grouted?
Yes. Grout at the bath-to-wall junction will crack as the bath flexes under load and as the building moves. Silicone is flexible and accommodates this movement. A cracked grout line at this seam is a direct route for water to enter the wall and floor structure. Silicone at this joint is not optional — it is the correct construction detail.
Ready to move from confusion to construction? Get in touch with Fixiz today for a no-pressure chat about your project and the fastest route to full compliance.